
The first thing to do is create an account on Shopify to get started. Follow the steps listed in the first section of our walkthrough for creating a Shopify store by clicking on the link here- Shopify Store. Return to this walkthrough after completing the steps in the first section (Labelled ‘Create Store’).
Now that you have created the store, adding the items to your menu is the next step.
Add your Menu
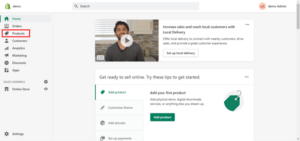
The left side of the screen has the navigation bar (see screenshot below and RED highlighted products nav bar). Click and access the products section.
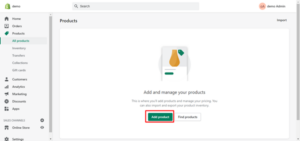
Now go to All Products sub menu.
Click the Add Product button (Figure 2) to go to the product section.
This page/section lets you add all your item details, title, description, images, and more. Be sure to fill all fields on this page. You might want to get creative with your description. Customers cannot smell the food from your website and will need vivid descriptions to make them want your food.

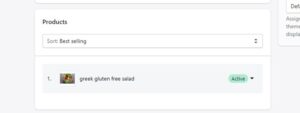
We recommend you carefully observe the two highlighted sections in Figure 3; see the two RED highlighted fields ‘product status’ and ‘organization.’ Let us go through these:
- Product Status: When you create a product, this field automatically is set to draft. Please set it to ‘active’ for your product to show up on your Shopify store. You can do this by clicking on the dropdown menu and selecting active.
- Product Organization: This section is essential because your menu has multiple items and categories. You may specify these over here to help quickly sort through your items as and when required. Remember, the essential part of this section is the collection and tags feature. It is explained below:
Tags and Collections
Tags
Shopify’s Tags are an essential feature that helps categorize your items and help customers find what they are looking for. For instance, if you are selling a salad, here is an excellent way to organize your tags:
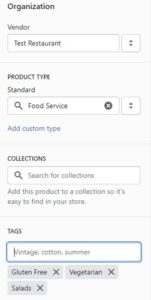
You should enter all relevant descriptors for the food item in the tag section. This will help you organize your collections, which are explained below:
Collections
Collections are a group of food items you desire to display on your Shopify store to your customers, all in one go. For instance, if you would like to show a choice of Salads, create a page for that collection helping customers find them quickly all on one page.
Shopify lets you create collections both manually and automatically using tags. Check out the collections link on the navigation bar ( RED highlighted in Fig. 5 below) on the left side, below the products section.
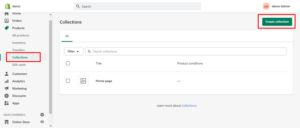
Click the collections section (RED highlighted in the screenshot above) to go to the Create Collection page (see screenshot below). The first two fields, ‘Title’ and ‘Description,’ let you enter your desired collection title and its appropriate description. The RED highlighted field ‘collection field’ enables you to configure the collection.
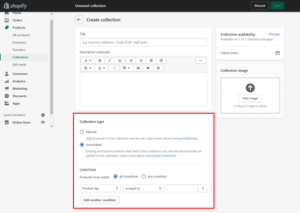
Shopify offers two types of collections- Manual and Automatic
Manual Collection
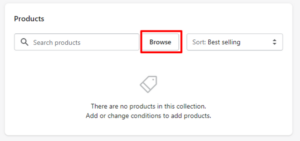
Manual Collection is a more straightforward method of configuration. Select manual collection type and click on the Save button. After Saving, the page will show the products section (see Fig.7 below). Now, you can click the browse button to view your saved products (see RED highlighted ‘Browse’ button)
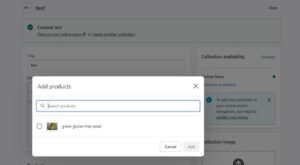
The browse button will show you the product pop-up window (pictured below). Here you will see all your products and can pick and choose whichever one you want.
On clicking the browse button, a pop-up window will come up (see screenshot below). You can view all the products that you can pick and choose whichever you need.
Automatic Collection
The Automatic Collection option helps you choose any of your saved products, based on the tags you had entered when creating the product. It is based on certain pre-configured conditions. See the screenshot to give you a clear idea:

Here, choose the dropdown option ‘Salad’ (See Figure 10), click on the Save button on top of the screen.
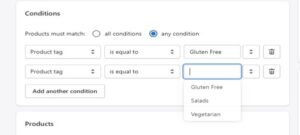
The collection automatically picks up all products tagged ‘Salad.’ In a few seconds, the page reloads, showing you the entire collection (See Figure 11)
Payment Setup
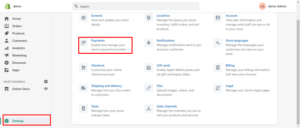
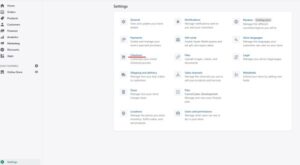
Once you set up Payment on your Shopify site, customers can order from your restaurant. Click the Settings link (RED highlighted on Figure 12) on the left side navigation bar to get this started.
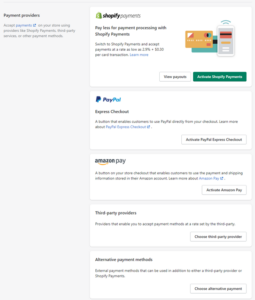
You are free to use a payment gateway of your choice. We recommend activating Shopify Payments, as shown below:
Setup Tips
As a restaurant, you want to be able to collect tips for your staff. Here is how you can set that up:
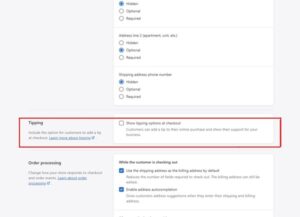
In the settings menu, go to the checkout section, underlined in the image below:
Now Scroll down to the tipping section shown in the image below and click on the check bow to enable tipping:
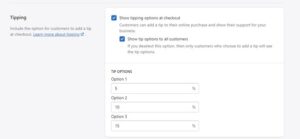
After checking the tipping options ON, the section will expand, allowing you to show customers three different tipping options that they can choose from. You can set the exact percentage of tips here as in the fields indicated below:
Congratulations! You now have a fully functional ecommerce site with products and payments all set up. Move to the next section to customize the look of your website.
Theme Customization
A Shopify theme is a collection of fonts, layouts, and colors that define the look of your website. Shopify has free themes available in its store. If you are looking for more, there are PAID themes to suit your needs.
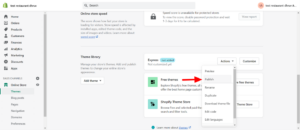
Click on “Online Store” on the left navigation pane. It will take you to the theme section. Here scroll down to find the free themes section (Highlighted in Fig. 17).

Click on the ‘Explore Free themes’ button, and you will see a page with all the available themes pictured below.
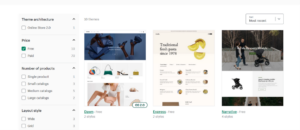
Select the theme you’d like to use, and it will show you details of the theme pictured below-
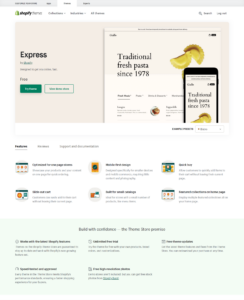
Add the theme to your store by clicking the green try theme button. Wait, we are not done yet. You have added the theme to your library, but you still need to enable it on the site. Find the theme you just added in the theme section and click on the ‘publish button’ under the action menu (pictured below)-
Shopify will ask you to confirm the change and then change your website’s theme. There you go, your site has a new look! However, you still need to add images and logos to the site to make it your own.
Add images and your logo
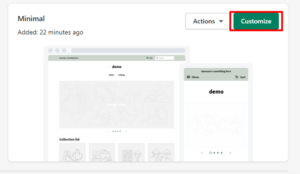
To complete the theme customization, you must add images and a logo to represent your brand. In the theme section, go to your current theme and click the customize button (Shown below)
You will get to the Customisation screen shown below
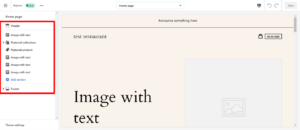
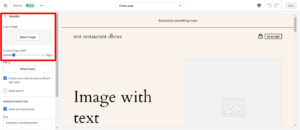
Take a look at the left-hand bar, highlighted RED. It contains all the different sections that you can customize. Click on the ‘Image with text’ to change the images on the Homepage Slideshow.
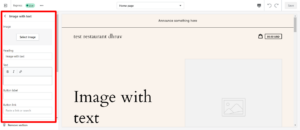
The menu will open and show the different options that you can change. Click on the fields to add your images and text here.
Similarly, you can go on to edit other sections of the site as well. For example, you can add your company logo to the website header. Click on ‘Header’ in the previous figure, and it will take you to the header settings, shown below-
Here you can add your company logo. Once you are done editing all parts of the website, you have completed the theme customization.